Python 是一种出色的编程语言,但打包是其最弱点之一。这是社会上众所周知的事实。多年来,安装、导入、使用和创建包的过程已经有了很大改进,但它仍然无法与 Go 和 Rust 等较新的语言相提并论,后者从 Python 和其他成熟语言的斗争中学到了很多东西。
在本教程中,您将学习有关编写、打包和分发您自己的包所需的所有知识。
如何编写 Python 库
Python 库是组织为 Python 包的 Python 模块的连贯集合。一般来说,这意味着所有模块都位于同一目录下,并且该目录位于 Python 搜索路径上。
让我们快速编写一个小的 Python 3 包并说明所有这些概念。
病理包
Python 3 有一个优秀的 Path 对象,这相对于 Python 2 笨拙的 os.path 模块来说是一个巨大的改进。但它缺少一项关键功能——查找当前脚本的路径。当您想要定位相对于当前脚本的访问文件时,这一点非常重要。
很多情况下,脚本可以安装在任何位置,因此不能使用绝对路径,而工作目录可以设置为任何值,因此不能使用相对路径。如果要访问子目录或父目录中的文件,则必须能够找出当前脚本目录。
以下是在 Python 中执行此操作的方法:
'import pathlib
script_dir = pathlib.Path(__file__).parent.resolve()
要访问当前脚本目录的“data”子目录中名为“file.txt”的文件,可以使用以下代码: print(open(str(script_dir/' data/file.txt').read())
使用病理学包,您有一个内置的 script_dir 方法,您可以像这样使用它:
'from pathology.Path import script_dir
print(open(str(script_dir()/'data/file.txt').read())
是的,有点拗口。病理包非常简单。它从 pathlib 的 Path 派生出自己的 Path 类,并添加一个始终返回调用脚本的路径的静态 script_dir() 。
这里是实现:
'import pathlib
import inspect
class Path(type(pathlib.Path())):
@staticmethod
def script_dir():
print(inspect.stack()[1].filename)
p = pathlib.Path(inspect.stack()[1].filename)
return p.parent.resolve()
由于pathlib.Path的跨平台实现,您可以直接从它派生,并且必须从特定子类派生(PosixPath or WindowsPath)。 script_dir 解析使用检查模块来查找调用者及其文件名属性。
测试病理包
每当您编写的内容不仅仅是一次性脚本时,您就应该对其进行测试。病理学模块也不例外。以下是使用标准单元测试框架的测试:
'import os
import shutil
from unittest import TestCase
from pathology.path import Path
class PathTest(TestCase):
def test_script_dir(self):
expected = os.path.abspath(os.path.dirname(__file__))
actual = str(Path.script_dir())
self.assertEqual(expected, actual)
def test_file_access(self):
script_dir = os.path.abspath(os.path.dirname(__file__))
subdir = os.path.join(script_dir, 'test_data')
if Path(subdir).is_dir():
shutil.rmtree(subdir)
os.makedirs(subdir)
file_path = str(Path(subdir)/'file.txt')
content = '123'
open(file_path, 'w').write(content)
test_path = Path.script_dir()/subdir/'file.txt'
actual = open(str(test_path)).read()
self.assertEqual(content, actual)
Python 路径
Python 包必须安装在 Python 搜索路径上的某个位置,才能由 Python 模块导入。 Python 搜索路径是一个目录列表,并且始终在 sys.path 中可用。这是我当前的 sys.path:
>>> print('n'.join(sys.path))

/Users/gigi.sayfan/miniconda3/envs/py3/lib/python36.zip
/Users/gigi.sayfan/miniconda3/envs/py3/lib/python3.6
/Users/gigi.sayfan/miniconda3/envs/py3/lib/python3.6/lib-dynload
/Users/gigi.sayfan/miniconda3/envs/py3/lib/python3.6/site-packages
/Users/gigi.sayfan/miniconda3/envs/py3/lib/python3.6/site-packages/setuptools-27.2.0-py3.6.egg
请注意,输出的第一个空行代表当前目录,因此您可以从当前工作目录导入模块,无论它是什么。您可以直接向 sys.path 添加或删除目录。
您还可以定义一个 PYTHONPATH 环境变量,还有一些其他方法可以控制它。默认情况下包含标准 site-packages,这是您通过 pip go 安装软件包的位置。
如何打包 Python 库
现在我们有了代码和测试,让我们将其全部打包到适当的库中。 Python 通过 setup 模块提供了一种简单的方法。您在程序包的根目录中创建一个名为 setup.py 的文件。
setup.py 文件包含大量元数据信息,例如作者、许可证、维护者以及有关包的其他信息。这是对 packages 项的补充,该项使用从 setuptools 导入的 find_packages() 函数来查找子包。
这是病理包的setup.py文件:
'from setuptools import setup, find_packages
setup(name='pathology',
version='0.1',
url='https://github.com/the-gigi/pathology',
license='MIT',
author='Gigi Sayfan',
author_email='the.gigi@gmail.com',
description='Add static script_dir() method to Path',
packages=find_packages(exclude=['tests']),
long_description=open('README.md').read(),
zip_safe=False)
源分发包
源分发包是指包含 Python 包、模块和用于包发布的其他文件(例如版本 1、版本 2 等)的存档文件。文件分发后,最终用户可以下载并将其安装在他们的操作系统上。
要创建源分发包 (sdist),请运行: python setup.py sdist
让我们构建一个源代码发行版:
'$ python setup.py sdist
running sdist
running egg_info
creating pathology.egg-info
writing pathology.egg-info/PKG-INFO
writing dependency_links to pathology.egg-info/dependency_links.txt
writing top-level names to pathology.egg-info/top_level.txt
writing manifest file 'pathology.egg-info/SOURCES.txt'
reading manifest file 'pathology.egg-info/SOURCES.txt'
writing manifest file 'pathology.egg-info/SOURCES.txt'
warning: sdist: standard file not found: should have one of README, README.rst, README.txt
running check
creating pathology-0.1
creating pathology-0.1/pathology
creating pathology-0.1/pathology.egg-info
copying files to pathology-0.1...
copying setup.py -> pathology-0.1
copying pathology/__init__.py -> pathology-0.1/pathology
copying pathology/path.py -> pathology-0.1/pathology
copying pathology.egg-info/PKG-INFO -> pathology-0.1/pathology.egg-info
copying pathology.egg-info/SOURCES.txt -> pathology-0.1/pathology.egg-info
copying pathology.egg-info/dependency_links.txt -> pathology-0.1/pathology.egg-info
copying pathology.egg-info/not-zip-safe -> pathology-0.1/pathology.egg-info
copying pathology.egg-info/top_level.txt -> pathology-0.1/pathology.egg-info
Writing pathology-0.1/setup.cfg
creating dist
Creating tar archive
removing 'pathology-0.1' (and everything under it)
该警告是因为我使用了非标准的 README.md 文件。忽略它是安全的。上面的命令将为当前操作系统创建一个默认格式的存档文件。对于Unix系统,将在dist目录下生成一个gzipped tar文件:
'$ ls -la dist
total 8
drwxr-xr-x 3 gigi.sayfan gigi.sayfan 102 Apr 18 21:20 .
drwxr-xr-x 12 gigi.sayfan gigi.sayfan 408 Apr 18 21:20 ..
-rw-r--r-- 1 gigi.sayfan gigi.sayfan 1223 Apr 18 21:20 pathology-0.1.tar.gz
如果您使用的是 Windows,则会生成一个 zip 文件。
您还可以使用格式选项指定其他附加文件格式,如下所示。
'python setup.py sdist --formats=gztar,zip
例如,上述命令将生成一个 gzip 压缩的 tarball 和一个 zip 文件。
可用的不同格式有:
-
zip: .zip -
gztar: .tar.gz -
bztar: .tar.bz2 -
xztar: .tar.xz -
ztar: .tar.Z -
tar: .tar
二进制分发
要创建一个名为“wheel”的二进制发行版,请运行: python setup.py bdist_wheel
这是一个二进制发行版:
'$ python setup.py bdist_wheel
running bdist_wheel
running build
running build_py
creating build
creating build/lib
creating build/lib/pathology
copying pathology/__init__.py -> build/lib/pathology
copying pathology/path.py -> build/lib/pathology
installing to build/bdist.macosx-10.7-x86_64/wheel
running install
running install_lib
creating build/bdist.macosx-10.7-x86_64
creating build/bdist.macosx-10.7-x86_64/wheel
creating build/bdist.macosx-10.7-x86_64/wheel/pathology
copying build/lib/pathology/__init__.py -> build/bdist.macosx-10.7-x86_64/wheel/pathology
copying build/lib/pathology/path.py -> build/bdist.macosx-10.7-x86_64/wheel/pathology
running install_egg_info
running egg_info
writing pathology.egg-info/PKG-INFO
writing dependency_links to pathology.egg-info/dependency_links.txt
writing top-level names to pathology.egg-info/top_level.txt
reading manifest file 'pathology.egg-info/SOURCES.txt'
writing manifest file 'pathology.egg-info/SOURCES.txt'
Copying pathology.egg-info to build/bdist.macosx-10.7-x86_64/wheel/pathology-0.1-py3.6.egg-info
running install_scripts
creating build/bdist.macosx-10.7-x86_64/wheel/pathology-0.1.dist-info/WHEEL
病理包仅包含纯Python模块,因此可以构建通用包。如果您的软件包包含 C 扩展,则必须为每个平台构建单独的轮子:
'$ ls -la dist
total 16
drwxr-xr-x 4 gigi.sayfan gigi.sayfan 136 Apr 18 21:24 .
drwxr-xr-x 13 gigi.sayfan gigi.sayfan 442 Apr 18 21:24 ..
-rw-r--r-- 1 gigi.sayfan gigi.sayfan 2695 Apr 18 21:24 pathology-0.1-py3-none-any.whl
-rw-r--r-- 1 gigi.sayfan gigi.sayfan 1223 Apr 18 21:20 pathology-0.1.tar.gz
要更深入地了解打包 Python 库的主题,请查看如何编写您自己的 Python 包。
如何分发 Python 包
Python 有一个名为 PyPI(Python 包索引)的中央包存储库。 PyPI 可以轻松管理不同版本的包。例如,如果用户需要安装特定的软件包版本,pip 知道在哪里查找它。
当您使用 pip 安装 Python 包时,它将从 PyPI 下载该包(除非您指定不同的存储库)。为了分发我们的病理包,我们需要将其上传到 PyPI 并提供 PyPI 所需的一些额外元数据。步骤是:
- 升级您的 pip 版本。
- 在 PyPI 上创建一个帐户(只需一次)。
- 注册您的包裹。
- 上传您的包。
升级您的 pip 版本
确保您的操作系统中安装了最新版本的 pip。要升级 pip,请发出以下命令
'python3 -m pip install --upgrade pip
创建帐户
您可以在 PyPI 网站上创建帐户。然后在您的主目录中创建一个 .pypirc 文件:
'[distutils]
index-servers=pypi
[pypi]
repository = https://pypi.python.org/pypi
username = the_gigi
出于测试目的,您可以将 pypitest 索引服务器添加到您的 .pypirc 文件中:
[distutils]
index-servers=
    pypi
    pypitest

[pypitest]
repository = https://testpypi.python.org/pypi
username = the_gigi

[pypi]
repository = https://pypi.python.org/pypi
username = the_gigi
注册您的包裹
如果这是您的软件包的第一个版本,您需要使用 PyPI 注册它。使用setup.py的注册命令。它会询问您的密码。请注意,我将其指向此处的测试存储库:
'$ python setup.py register -r pypitest
running register
running egg_info
writing pathology.egg-info/PKG-INFO
writing dependency_links to pathology.egg-info/dependency_links.txt
writing top-level names to pathology.egg-info/top_level.txt
reading manifest file 'pathology.egg-info/SOURCES.txt'
writing manifest file 'pathology.egg-info/SOURCES.txt'
running check
Password:
Registering pathology to https://testpypi.python.org/pypi
Server response (200): OK
上传您的包
现在包已注册,我们可以上传它了。我建议使用麻线,这样更安全。像往常一样使用 pip install twine 安装它。然后使用 twine 上传您的包并提供您的密码(在下面进行编辑):
$ twine upload -r pypitest -p <redacted> dist/*
Uploading distributions to https://testpypi.python.org/pypi
Uploading pathology-0.1-py3-none-any.whl
[================================] 5679/5679 - 00:00:02
Uploading pathology-0.1.tar.gz
[================================] 4185/4185 - 00:00:01
该软件包现已在 PyPI 官方网站上提供,如下所示。
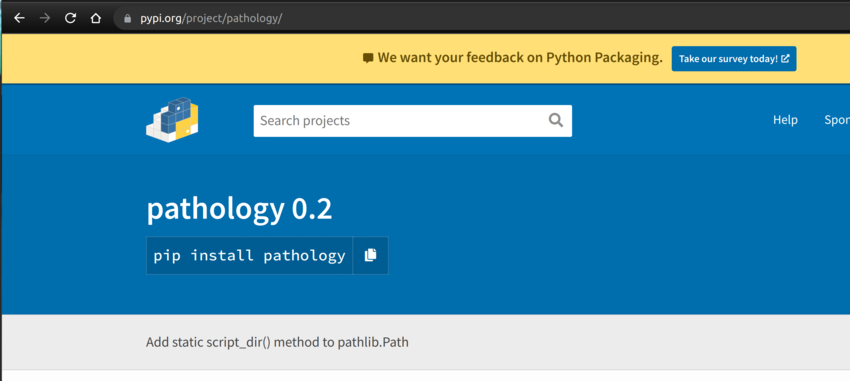
要使用 pip 安装它,只需发出以下命令:
'pip install pathology
要更深入地了解分发包的主题,请查看如何共享您的 Python 包。
结论
在本教程中,我们完成了编写 Python 库、打包并通过 PyPI 分发它的完整过程。此时,您应该拥有编写库并与世界共享库的所有工具。
本文已根据 Esther Vaati 的贡献进行了更新。 Esther 是 Envato Tuts+ 的软件开发人员和作家。


