在本系列中,我们一直在研究 WordPress 分类法:它们是什么、它们如何工作、如何区分现有的不同类型以及它们如何存储在底层数据库中。 p>
我们唯一要做的事情就是组装一个插件,演示如何使用 API 来实现我们自己的自定义分类法。因此,在这篇文章中,我们将正是这样做的。
回想一下本系列的第一篇文章:
分类是大多数人从未听说过或使用过的词语之一。基本上,分类法是将事物分组在一起的一种方法。
在整个系列中,我们一直使用摄影和摄像作为分类示例。因此,对于我们要构建的插件,我们将包括与这两个分类相关的分层和非分层分类法。
- 分层分类法将包括照片和视频的基本分类法。
- 非层次分类法将用于指定所使用的胶片类型。这可以是黑白、彩色、棕褐色或您想要指定的任何颜色。
最后,该插件将与 WordPress 附带的现有标准帖子类型一起使用。这应该提供最大的灵活性,因为它涉及构建插件、演示概念以及在您自己的安装中使用它。
我的自定义分类法
出于示例插件的目的,我们将其称为我的自定义分类法,并且我们将在以下阶段构建它:
- 我们将准备核心插件文件,其中包含在 WordPress 仪表板中显示插件所需的正确标题文本。
- 我们将设置执行核心插件所需的代码。
- 我们将编写代码来引入照片和视频分类。
- 我们将编写代码来引入电影类型分类法。
- 然后我们将测试完整的插件。
1。插件头
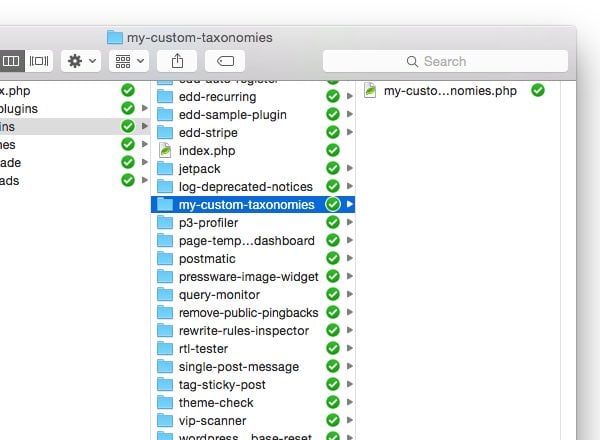
在做任何其他事情之前,先在 wp-content/plugins 中创建一个名为 my-custom-taxonomies 的目录,并引入一个名为 我的自定义分类法.php。
在文件中添加以下代码注释块:
'<?php
/**
* My Custom Taxonomies
*
* Demonstrates how to create custom taxonomies using the WordPress API.
* Showcases both hierarchical and non-hierarchical taxonomies.
*
* @link https://code.tutsplus.com/series/the-beginners-guide-to-wordpress-taxonomies--cms-706
* @since 1.0.0
* @package Custom_Taxonomies
*
* @wordpress-plugin
* Plugin Name: My Custom Taxonomies
* Plugin URI: http://example.com/plugin-name-uri/
* Description: Demonstrates how to create custom taxonomies using the WordPress API.
* Version: 1.0.0
* Author: Tom McFarlin
* Author URI: http://tommcfarlin.com/
* License: GPL-2.0+
* License URI: http://www.gnu.org/licenses/gpl-2.0.txt
*/
此时,您应该能够登录 WordPress 仪表板,查看插件的名称并激活它。当然,实际上什么也不会发生,因为我们还没有对源代码做任何事情。
接下来,我们需要创建另一个文件来实际为插件提供动力。这将基于面向对象的编程原则,因此我们将创建一个名为 class-my-custom-taxonomies.php 的文件。
暂时不用担心用任何源代码填充它。让我们返回到 my-custom-taxonomies.php 并添加一个条件以确保核心插件文件无法在 WordPress 环境之外运行。
<?php

// If this file is called directly, abort.
if ( ! defined( 'WPINC' ) ) {
    die;
}
将其直接放在我们上面提供的代码注释下。
2。执行核心插件
此时,我们已准备好编写实际驱动插件的代码。因此,让我们定义一个类和一个用于初始化的基本函数:
'<?php
/**
* The core plugin class file
*
* Defines the functions necessary to register our custom taxonomies with
* WordPress.
*
* @link http://code.tutsplus.com/series/the-beginners-guide-to-wordpress-taxonomies--cms-706
* @since 1.0.0
*
* @package Custom_Taxonomies
* @author Tom McFarlin <tom@tommcfarlin.com>
*/
class My_Custom_Taxonomies {
/**
* Initializes the plugin by registering the hooks necessary
* for creating our custom taxonomies within WordPress.
*
* @since 1.0.0
*/
public function init() {
}
}
之后,让我们返回 my-custom-taxonomies.php 并添加代码以包含该文件以及创建该类实例并执行它的方法: p>
<?php

/** Loads the custom taxonomy class file. */
require_once( dirname( __FILE__ ) . '/class-my-custom-taxonomies.php' );

/**
 * Creates an instance of the My_Custom_Taxonomies class
 * and calls its initialization method.
 *
 * @since    1.0.0
 */
function custom_taxonomies_run() {

    $custom_tax = new My_Custom_Taxonomies();
	$custom_tax->init();

}
custom_taxonomies_run();
现在我们已经拥有了开始实际设置挂钩和回调以创建自定义分类法所需的一切。
3。介绍照片和视频
此时,我们已准备好开始引入我们的分类法。我们首先关注两个分层分类法 - 照片和视频。
在 class-my-custom-taxonomies.php 文件的类主体中,添加以下函数:
<?php
/**
* Creates the Photographs taxonomy that appears on all Post dashboard
* pages.
*
* @since 1.0.0
*/
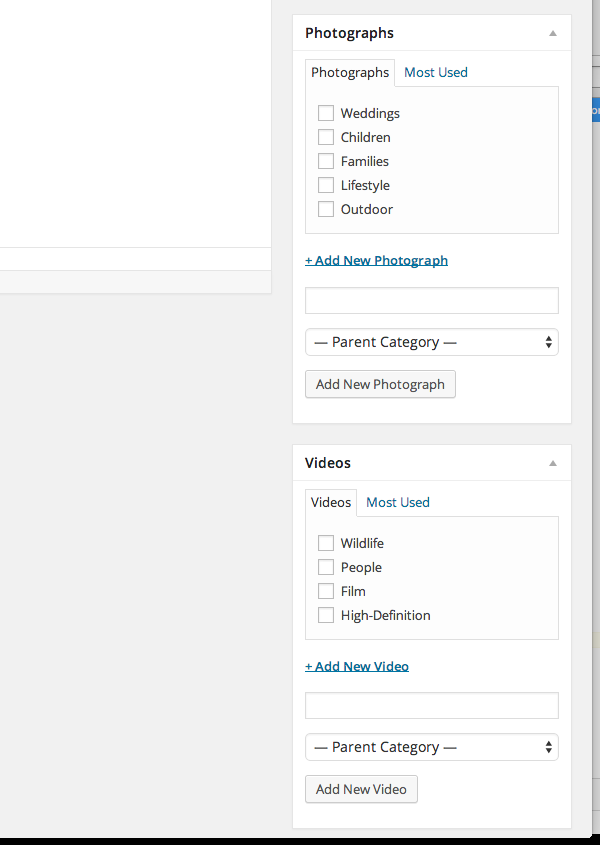
public function init_photographs() {
$labels = array(
'name' => 'Photographs',
'singular_name' => 'Photograph',
'edit_item' => 'Edit Photograph',
'update_item' => 'Update Photograph',
'add_new_item' => 'Add New Photograph',
'menu_name' => 'Photographs'
);
$args = array(
'hierarchical' => true,
'labels' => $labels,
'show_ui' => true,
'show_admin_column' => true,
'rewrite' => array( 'slug' => 'photograph' )
);
register_taxonomy( 'photograph', 'post', $args );
}
此函数负责创建照片分类,并会在适当的时候从 init 函数中调用。
现在,让我们对视频执行同样的操作:
'<?php
/**
* Creates the Videos taxonomy that appears on all Post dashboard
* pages.
*
* @since 1.0.0
*/
public function init_videos() {
$labels = array(
'name' => 'Videos',
'singular_name' => 'Video',
'edit_item' => 'Edit Video',
'update_item' => 'Update Video',
'add_new_item' => 'Add New Video',
'menu_name' => 'Videos'
);
$args = array(
'hierarchical' => false,
'labels' => $labels,
'show_ui' => true,
'show_admin_column' => true,
'rewrite' => array( 'slug' => 'video' )
);
register_taxonomy( 'video', 'post', $args );
}
让我们在 init 函数中调用这两个函数。我们通过使用 WordPress 提供的 init 挂钩注册这些函数来实现此目的:
<?php

public function init() {

    add_action( 'init', array( $this, 'init_photographs' ) );
    add_action( 'init', array( $this, 'init_videos' ) );

}
在这里,我们应该能够转到添加新帖子并在仪表板中看到新的分类选项。如果没有,请根据上面共享的代码仔细检查您的代码。
现在我们已经介绍了分层分类法,让我们继续介绍我们的影片类型 - 或我们的非分层 - 分类法。
4。介绍影片类型
这实际上与我们到目前为止编写的代码没有太大不同。实际上,主要区别在于,我们不是将 hierarchical 指定为 true,而是将其设置为 false。
<?php

/**
 * Creates the Film Type taxonomy that appears on all Post dashboard
 * pages.
 *
 * @since    1.0.0
 */
public function init_film_type() {

    $labels = array(
		'name'          => 'Film Type',
		'singular_name' => 'Film Type',
		'edit_item'     => 'Edit Film Type',
		'update_item'   => 'Update Film Type',
		'add_new_item'  => 'Add New Film Type',
		'menu_name'     => 'Film Type'
	);

	$args = array(
		'hierarchical'      => false,
		'labels'            => $labels,
		'show_ui'           => true,
		'show_admin_column' => true,
		'rewrite'           => array( 'slug' => 'film-type' )
	);

	register_taxonomy( 'film-type', 'post', $args );

}
这将导致不同类型的用户界面元素,看起来更像标签,而不是您在上面看到的类别选项。
最后,将以下行与其余钩子一起添加到 init 方法中:
'<?php
add_action( 'init', array( $this, 'init_film_type' ) );
请注意,函数更像是分类标签。再次重申,这是分层分类法和非分层分类法的主要区别之一。
5。测试完整插件
现在我们准备好试用该插件了。假设您正确遵循了本教程中的所有内容,那么您应该能够创建新帖子,并使用照片类型或视频类型对其进行标记作为影片的一种类型,并在保存或更新您的帖子后保留更改。
如果没有,请根据此处引用的内容以及关联的 GitHub 存储库中引用的内容仔细检查您的代码。
结论
WordPress 分类法初学者指南到此结束。在整个系列中,我们广泛了解了分类法的定义、它们在 WordPress 中扮演的角色,甚至还实现了一些我们自己的分类法。
此时,您应该对这个概念以及如何将它们包含在您的下一个项目中有深入的了解。
如果没有,请随时在下面的字段中留下问题、评论或一般反馈。


