无论我们尝试使 Web 应用程序多么简单,引导新用户完成第一次体验通常都是有帮助的。视觉游览可能是最简单的方法。
如果您关注过我的 Envato Tuts+ 使用 PHP 创建您的初创公司系列,那么您就会熟悉会议规划器。在观察用户安排第一次会议后,我决定最好构建某种指南。
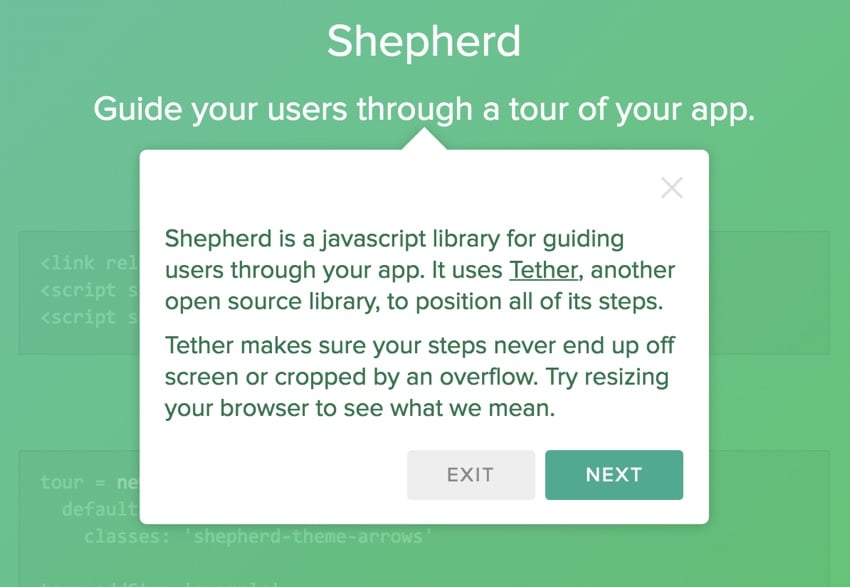
起初,我考虑自己构建它,但后来我找到了一个开源选项,Shepherd。
在今天的教程中,我将向您介绍如何使用 Shepherd 构建可视化用户之旅。使用 Shepherd 相对简单,我将回顾一些我自己用来简化创作过程的代码。
Shepherd 是 HubSpot(一项入站营销服务)的开源产品。感谢他们提供了一个强大的库和良好的文档。
Shepherd 的工作原理
让我们看一下 Shepherd 的一个简单场景。
使用 Shepherd 将基本浏览集成到您的应用程序中非常简单。首先,您选择一个主题文件并集成其 JavaScript,如下所示:
'
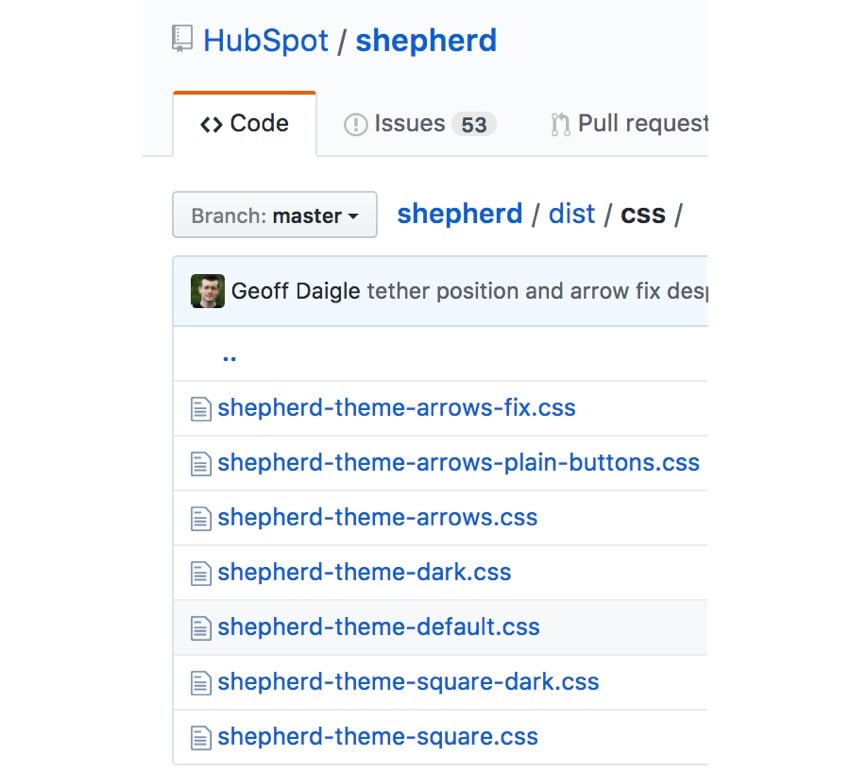
<link rel="stylesheet" href="shepherd-theme-arrows.css" />
<script src="tether.min.js"></script>
<script src="shepherd.min.js"></script>
您可以从 Shepherd GitHub 页面下载文件。我使用上面的 shepherd-theme-arrows.css ,但您可以从下面的任何默认值中进行选择并自定义它们:
接下来,您创建一个游览对象:
'
const tour = new Shepherd.Tour({
  defaultStepOptions: {
    classes: \'shepherd-theme-arrows\',
    scrollTo: true
  }
});
使用 defaultStepOptions 键创建游览时,可以为所有步骤定义默认值。 classes 指的是您使用的主题定义,例如shepherd-theme-arrows 和 scrollTo 有助于在 scrollIntoView() 方法的帮助下确保所有步骤都出现在可见视口中。
然后,您可以向游览添加单独的步骤:
'
tour.addStep(\'example-step\', {
  text: \'This step is attached to the bottom of the .
example-css-selector element.\',
  attachTo: { element: \'.example-css-selector\', on: \'bottom\'},
  classes: \'example-step-extra-class\',
  buttons: [
    {
      text: \'Next\',
      action: tour.next
    }
  ]
});
text 是出现在视觉之旅正文中的内容。文本可以是常规 HTML 字符串,也可以是 HTMLElement 对象。您还可以在此处提供一个回调函数,该函数将在构建步骤时执行。但是,它必须返回 HTML 字符串或 HTMLElement 对象。
attachTo 关键点指向要附加此步骤的项目的 CSS 选择器。它期望一个对象作为其值。
buttons 键允许您定义一个或多个按钮及其操作,例如。 Next.该键接受按钮对象数组作为其值。按钮对象将具有控制按钮行为和外观的键值对。
最后,您开始游览:
'
tour.start();
Shepherd 构建于 Tether(另一个 HubSpot 开源产品)之上,它有助于将元素定位到页面上的其他元素。 Tether 确保您的步数不会溢出屏幕或被裁剪。
将 Tether 集成到您自己的应用程序中
当我开始尝试 Shepherd 时,我很快发现编写包含许多步骤的指南可能会相当冗长。这是我在自己的实现中解决的问题。
我不想使用大量需要长期维护的 JavaScript 代码来编写游览。相反,我选择创建一个数组,并根据用户是在游览的开始还是结束时以编程方式自定义按钮。
例如,我创建一个 steps[] 数组并通过填充该数组来定义游览:
const tour = new Shepherd.Tour({
defaultStepOptions: {
classes: \'shepherd-theme-arrows\',
scrollTo: true
}
});
const steps = [];
steps.push({
attachTo: {
element: \'.nav-tabs\',
on: \'top\'
},
title: \'Welcome\',
text: `Allow me to show you how to plan a ${title}. <p>If you prefer, you can <a href="javascript::return false;" onclick="turnOffGuide();">turn off this guide</a>.<br /><br />`
});
steps.push({
attachTo: {
element: \'#headingWho\',
on: \'top\'
},
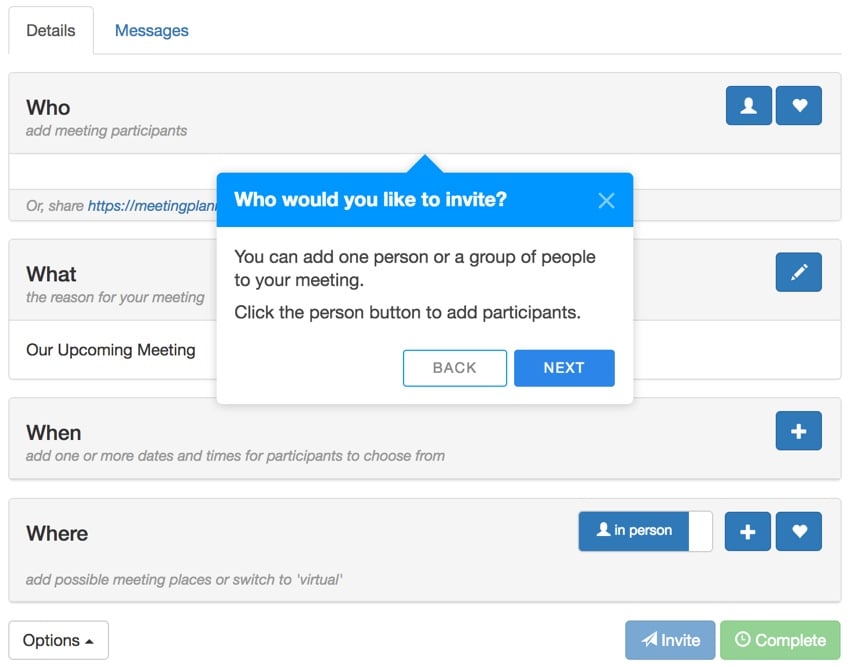
title: \'Who would you like to invite?\',
text: `You can add one person or a group of people to your ${title}. <p>Click the person button to add participants.</p>`
});
steps.push({
attachTo: {
element: \'#invitation-url\',
on: \'bottom\'
},
title: \'Inviting by email\',
text: \'Alternately, you can email the meeting link to your participant(s)\'
});
steps.push({
attachTo: {
element: \'#headingWhat\',
on: \'bottom\'
},
title: \'What is your meeting about?\',
text: `You can customize the subject of your ${title}. We\'ll use it for the invitation and reminder emails.<p>Click the pencil button to edit the subject.</p>`
});
if ($(\'#headingActivity\').length > 0) {
steps.push({
attachTo: {
element: \'#headingActivity\',
on: \'top\'
},
title: \'What do you want to do?\',
text: \'You can suggest one or more activity ideas. With multiple ideas, your participants can help you select their favorite. <p>Click the plus button to suggest activities.</p>\'
});
}
steps.push({
attachTo: {
element: \'#headingWhen\',
on: \'top\'
},
title: \'When do you want to meet?\',
text: `Suggest one or more dates and times for your ${title}. With more than one, your participants can help you choose. <p>Click the + button to add them.</p>`
});
steps.push({
attachTo: {
element: \'#headingWhere\',
on: \'top\'
},
title: \'Where do you want to meet?\',
text: `Suggest one or more places for your ${title}. With multiple places, your participants can help you choose. <p>We use Google Places to simplify adding them. Click the + button to begin.</p>`
});
steps.push({
attachTo: {
element: \'.virtualThing\',
on: \'top\'
},
title: \'Is this a virtual meeting?\',
text: `Switch between <em>in person</em> and <em>virtual</em> ${title}s such as phone calls or online conferences.`
});
steps.push({
attachTo: {
element: \'#actionSend\',
on: \'top\'
},
title: \'Sending invitations\',
text: `Scheduling is collaborative. After you add times and places, you can <strong>Invite</strong> participants to select their favorites. <em>A place isn\'t necessary for virtual ${title}s.</em>`
});
steps.push({
attachTo: {
element: \'#actionFinalize\',
on: \'right\'
},
title: \'Finalizing the plan\',
text: `Once you choose a time and place, you can <strong>Complete</strong> the plan. We\'ll email the invitations and setup reminders.`
});
steps.push({
attachTo: {
element: \'#tourDiscussion\',
on: \'left\'
},
title: \'Share messages with participants\',
text: \'You can write back and forth with participants on the <strong>Messages</strong> tab. <p>Messages are delivered via email.</p>\'
});
steps.push({
attachTo: {
element: \'.container\',
on: \'top\'
},
title: \'Ask a question\',
text: `Need help? <a href="${$(\'#url_prefix\').val()}/ticket/create">Ask a question</a> and we\'ll respond as quickly as we can. <p>If you prefer, you can <a href="${$(\'#url_prefix\').val()}/user-setting?tab=guide">turn off the guide</a> in settings.</p>`
});
我添加到数组中的每个对象元素都包含三个关键信息:
- 此步骤指向的 CSS 视觉元素以及它应附加到该元素的位置。例如
{element: \'.nav-tabs\', on:\'top\'} title键中标题的文本,例如\'你想什么时候见面?\'text键
对我来说,维护这个数组比为教程的每个步骤定义按钮要简单得多。但是,这意味着我在将步骤加载到游览中时需要以编程方式定义按钮。
我编写此代码是为了正确添加和响应游览按钮。每一步,它都会创建一个 buttons 数组,否则我必须手动定义该数组:
for (let i = 0; i < steps.length; i++) {

    let buttons=[];

    // no back button at the start
    if (i>0) {
        buttons.push({
          text: \'Back\',
          classes: \'shepherd-button-secondary\',
          action: function() {
            return tour.back();
          }
        });
    }

    // no next button on last step
    if (i!=(steps.length-1)) {
        buttons.push({
          text: \'Next\',
          classes: \'shepherd-button-primary\',
          action: function() {
            return tour.next();
          }
        });
    } else {
        buttons.push({
          text: \'Close\',
          classes: \'shepherd-button-primary\',
          action: function() {
            return tour.hide();
          }
        });
    }
例如,第一步没有后退按钮,最后一步没有下一步按钮。但最后一步确实有一个关闭按钮。
然后,我的数组中的每个步骤和每个按钮数组都会添加到游览中。
'
    tour.addStep(`step_${i}`, {
        text: steps[i].text,
        title: steps[i].title,
        attachTo: steps[i].attachTo,
        classes: \'shepherd shepherd-open shepherd-theme-arrows shepherd-transparent-text\',
        buttons: buttons,
    });
}
使用这种方法,我不必为教程的每个步骤重复重新定义相同的按钮。它还提供了一些编程能力,可以为未来动态定制游览。
使用我选择的 PHP 编程框架 Yii,我将必要的包含文件添加到我的资源文件中。这会加载到需要游览的特定页面上。就我而言,会议安排页面:
'
<?php
namespace frontend\assets;
use yii\web\AssetBundle;
class MeetingAsset extends AssetBundle
{
    public $basePath = \'@webroot\';
    public $baseUrl = \'@web\';
    public $css = [
      ...
      \'css/shepherd-theme-arrows.css\',
    ];
    public $js = [
      \'js/meeting.js\',
      ...
      \'js/tether.min.js\',
      \'js/shepherd.min.js\',
      \'js/meeting_tour.js\',
    ];
    ...
您将在上面看到 Shepherd 主题的 CSS 和 Tether、Shepherd 的 JavaScript,以及我的游览定义文件 meeting_tour.js。
我还添加了 CSS 来将游览弹出窗口的整体宽度控制为视口的 40%:
'
.shepherd-element.shepherd-theme-arrows {
  max-width: 40%;
}
您可以观看上面或 Vimeo 上的示例游览视频。如果您想亲自尝试,请在 Meeting Planner 上注册,然后您将立即进入安排导览。
其他需要考虑的事项
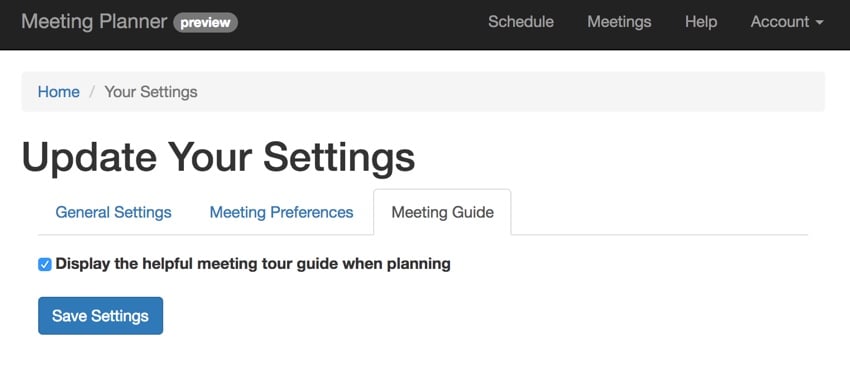
关闭视觉游览
我创建了一个用户设置,供人们快速关闭游览。我没有在每个步骤中添加一个分散注意力的关闭按钮,而是在导览的第一个和最后一个步骤中添加了一个关闭指南的链接:
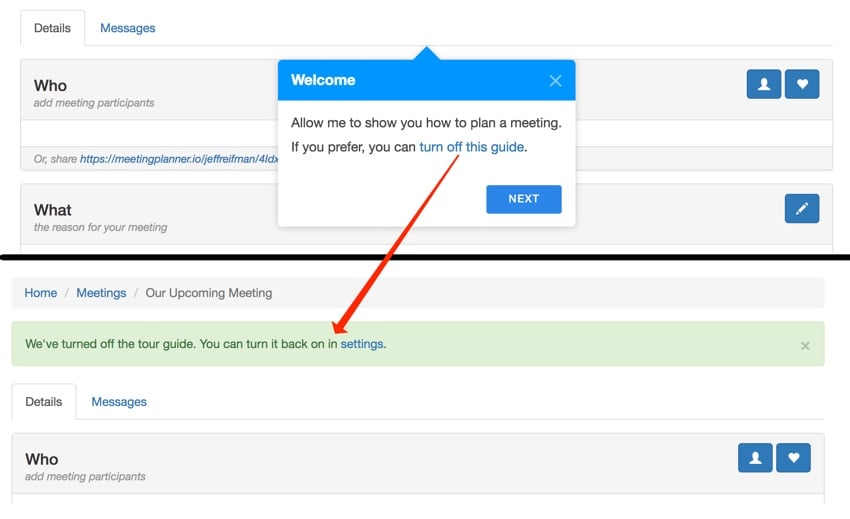
通过 AJAX 以交互方式将其关闭,并显示指向下面设置页面的有用链接。这可以帮助新用户轻松找到如何重新打开游览:
Shepherd 的高级功能
我刚刚向您展示了 Shepherd 的基础知识以及如何将其快速集成到您的 Web 应用程序中。到目前为止,除了偶尔出现箭头问题之外,它对我来说效果很好。然而,Shepherd 提供的功能比我所评论的要多得多,特别是在事件处理和管理方面。这允许您以更加定制的方式调整您的游览以适应您的应用程序和用户的当前状态。他们也有非常好的文档。
例如,如果用户跳转到网页的某个区域,您可以让事件自动触发跳转到游览的另一个步骤。我可能会在以后的教程中深入探讨这一点。
正在结束
我希望您喜欢了解 Shepherd。它无疑是一个视觉效果优美、开发人员友好的视觉之旅,您可以快速集成到任何应用程序中。
相关链接
- GitHub 上的 Shepherd
- 会议策划者(创建您的第一次会议以观看视觉导览)
本文已根据 Monty Shokeen 的贡献进行了更新。 Monty 是一位全栈开发人员,他也喜欢编写教程和学习新的 JavaScript 库。


