我们一直在研究如何在 WordPress 中创建一个简单的 CRM 系统。在本系列的最后一部分中,我们探讨了如何使用角色来限制用户对 WordPress 管理界面部分内容的访问。
今天我们将介绍如何使用自定义功能仅限制对联系人自定义帖子类型的访问。
自定义功能
虽然我们之前降低了 WordPress 用户的访问级别,但通过将他们分配给编辑或作者角色,用户仍然可以管理帖子和评论。这些功能对我们来说都没有用,因此我们需要进一步限制访问,允许指定的用户只能访问联系人自定义帖子类型。
我们可以通过以下方式做到这一点:
- 在我们的自定义帖子类型上注册自定义功能
- 创建新的 WordPress 用户角色,仅将我们新的自定义功能分配给该角色
- 创建/编辑 WordPress 用户,并将其分配给新的联系人角色
在我们的自定义帖子类型上注册自定义功能
注册自定义功能使我们能够稍后定义哪些 WordPress 角色可以访问这些功能,例如,作者是否可以创建新的联系人。
让我们编辑插件文件的 register_post_type() 函数调用,将 capability_type => 'post' 替换为以下内容:
'capabilities' => array(
    'edit_others_posts'		=> 'edit_others_contacts',
	'delete_others_posts'	=> 'delete_others_contacts',
	'delete_private_posts'	=> 'delete_private_contacts',
	'edit_private_posts'	=> 'edit_private_contacts',
	'read_private_posts'	=> 'read_private_contacts',
	'edit_published_posts'	=> 'edit_published_contacts',
	'publish_posts'			=> 'publish_contacts',
	'delete_published_posts'=> 'delete_published_contacts',
	'edit_posts'			=> 'edit_contacts'	,
	'delete_posts'			=> 'delete_contacts',
	'edit_post' 			=> 'edit_contact',
    'read_post' 			=> 'read_contact',
    'delete_post' 			=> 'delete_contact',
),
'map_meta_cap' => true,
我们的 register_post_type() 函数现在应如下所示:
/**
* Registers a Custom Post Type called contact
*/
function register_custom_post_type() {
	register_post_type( 'contact', array(
        'labels' => array(
			'name'               => _x( 'Contacts', 'post type general name', 'tuts-crm' ),
			'singular_name'      => _x( 'Contact', 'post type singular name', 'tuts-crm' ),
			'menu_name'          => _x( 'Contacts', 'admin menu', 'tuts-crm' ),
			'name_admin_bar'     => _x( 'Contact', 'add new on admin bar', 'tuts-crm' ),
			'add_new'            => _x( 'Add New', 'contact', 'tuts-crm' ),
			'add_new_item'       => __( 'Add New Contact', 'tuts-crm' ),
			'new_item'           => __( 'New Contact', 'tuts-crm' ),
			'edit_item'          => __( 'Edit Contact', 'tuts-crm' ),
			'view_item'          => __( 'View Contact', 'tuts-crm' ),
			'all_items'          => __( 'All Contacts', 'tuts-crm' ),
			'search_items'       => __( 'Search Contacts', 'tuts-crm' ),
			'parent_item_colon'  => __( 'Parent Contacts:', 'tuts-crm' ),
			'not_found'          => __( 'No contacts found.', 'tuts-crm' ),
			'not_found_in_trash' => __( 'No contacts found in Trash.', 'tuts-crm' ),
		),

        // Frontend
        'has_archive' => false,
        'public' => false,
        'publicly_queryable' => false,

        // Admin
        'capabilities' => array(
	        'edit_others_posts'		=> 'edit_others_contacts',
			'delete_others_posts'	=> 'delete_others_contacts',
			'delete_private_posts'	=> 'delete_private_contacts',
			'edit_private_posts'	=> 'edit_private_contacts',
			'read_private_posts'	=> 'read_private_contacts',
			'edit_published_posts'	=> 'edit_published_contacts',
			'publish_posts'			=> 'publish_contacts',
			'delete_published_posts'=> 'delete_published_contacts',
			'edit_posts'			=> 'edit_contacts'	,
			'delete_posts'			=> 'delete_contacts',
			'edit_post' 			=> 'edit_contact',
	        'read_post' 			=> 'read_contact',
	        'delete_post' 			=> 'delete_contact',
        ),
        'map_meta_cap' => true,
        'menu_icon' => 'dashicons-businessman',
        'menu_position' => 10,
        'query_var' => true,
        'show_in_menu' => true,
        'show_ui' => true,
        'supports' => array(
        	'title',
        	'author',
        	'comments',
        ),
    ) );
}
这里发生了两件事:
- 我们使用
capability参数定义了自己的功能,并将它们映射到其 Post 等效项。这可确保 WordPress 准确理解这些功能的含义(即edit_contact的行为方式与edit_post功能相同,只不过它适用于我们的联系人自定义帖子类型)。 - 我们已告知 WordPress 使用
map_meta_cap将上述功能映射到 WordPress 的原始功能,以便强制执行。
以任何用户身份重新加载 WordPress 管理,您将看到我们的联系人自定义帖子类型已从 WordPress 管理菜单中消失:
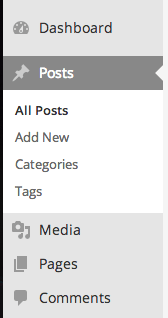
发生这种情况是因为我们现在需要告诉 WordPress 哪些角色具有新的联系人功能(edit_contact、edit_contacts 等)。
创建新的 WordPress 用户角色,为其分配新的自定义功能
使用 add_role(),我们可以创建一个新的 WordPress 用户角色并向其分配我们的联系人功能。该角色存储在 WordPress 选项数据中,因此我们只需调用该函数一次。
为此,请在我们的插件中的 __construct() 函数末尾添加以下函数:
/**
* Activation hook to register a new Role and assign it our Contact Capabilities
*/
function plugin_activation() {

	// Define our custom capabilities
	$customCaps = array(
		'edit_others_contacts'			=> true,
		'delete_others_contacts'		=> true,
		'delete_private_contacts'		=> true,
		'edit_private_contacts'			=> true,
		'read_private_contacts'			=> true,
		'edit_published_contacts'		=> true,
		'publish_contacts'			=> true,
		'delete_published_contacts'		=> true,
		'edit_contacts'				=> true,
		'delete_contacts'			=> true,
		'edit_contact'				=> true,
		'read_contact'				=> true,
		'delete_contact'			=> true,
		'read'					=> true,
	);

	// Create our CRM role and assign the custom capabilities to it
	add_role( 'crm', __( 'CRM', 'tuts-crm'), $customCaps );

}
此功能将向 WordPress 添加一个名为 CRM 的新角色。分配给此角色的用户只能访问联系人功能。因此,他们只能访问联系人自定义帖子类型。
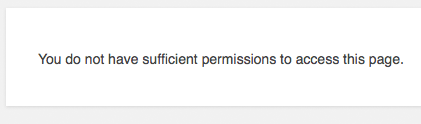
请注意,我们还为此角色分配了 read 功能。这是允许用户编辑其个人资料(姓名、密码等)所必需的。我们需要允许用户执行此操作,因为当他们登录时,WordPress 会自动将他们重定向到个人资料屏幕。
如果我们没有分配 read 功能,用户登录时会发生以下情况:
要运行我们的 plugin_activation() 函数一次,我们将以下代码添加到插件文件的末尾:
register_activation_hook( __FILE__, array( &$wpTutsCRM, 'plugin_activation' ) );
这告诉 WordPress,在激活插件时,它需要调用 WPTutsCRM 类中的 plugin_activation() 函数。
创建/编辑 WordPress 用户,将他们分配给新的联系人角色
接下来,停用并重新激活您的插件,然后导航至 WordPress 管理界面中的用户 > 添加新的。
如果一切顺利,您将看到新的 CRM 角色出现在下拉列表中:

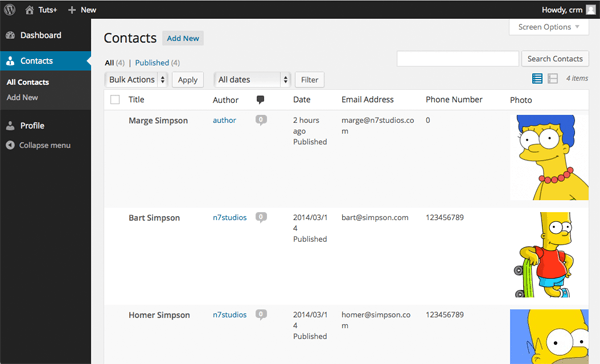
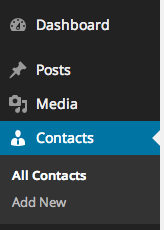
让我们继续创建一个名为 crm 的新用户,并以该新用户身份登录。我们现在应该看到我们的联系人,其中仪表板和个人资料是唯一的其他菜单选项:
为其他角色分配自定义功能
如果我们注销并以 WordPress 管理员、编辑或作者身份重新登录,您会发现 WordPress 管理菜单中仍然缺少联系人自定义帖子类型:
这个是因为我们只分配了 CRM 角色我们的联系人自定义帖子类型的功能。因此,所有其他用户角色仍然无权访问此帖子类型。
To fix this, let’s assign the Custom Capabilities to the Administrator and Editor Roles by adding the following code to the end of the plugin_activation() function:
// Add custom capabilities to Admin and Editor Roles
$roles = array( 'administrator', 'editor' );
foreach ( $roles as $roleName ) {
	// Get role
	$role = get_role( $roleName );

	// Check role exists
	if ( is_null( $role) ) {
		continue;
	}

	// Iterate through our custom capabilities, adding them
	// to this role if they are enabled
	foreach ( $customCaps as $capability => $enabled ) {
		if ( $enabled ) {
			// Add capability
			$role->add_cap( $capability );
		}
	}
}
在这里,我们迭代要为其分配自定义功能的角色,检查该角色是否存在。如果是,我们就会迭代之前定义的自定义功能,将它们添加到角色中。
您会注意到我们没有向作者角色添加任何自定义功能;这是因为我们不想分配所有功能,因为作者角色传统上只允许对该用户自己的帖子进行写入访问。
让我们通过为作者角色添加一些功能来继续构建我们的 plugin_activation() 函数:
// Add some of our custom capabilities to the Author Role
$role = get_role( 'author' );
$role->add_cap( 'edit_contact' );
$role->add_cap( 'edit_contacts' );
$role->add_cap( 'publish_contacts' );
$role->add_cap( 'read_contact' );
$role->add_cap( 'delete_contact' );
unset( $role );
我们的整个函数现在应该如下所示:
/**
* Activation hook to register a new Role and assign it our Contact Capabilities
*/
function plugin_activation() {

	// Define our custom capabilities
	$customCaps = array(
		'edit_others_contacts'			=> true,
		'delete_others_contacts'		=> true,
		'delete_private_contacts'		=> true,
		'edit_private_contacts'			=> true,
		'read_private_contacts'			=> true,
		'edit_published_contacts'		=> true,
		'publish_contacts'				=> true,
		'delete_published_contacts'		=> true,
		'edit_contacts'					=> true,
		'delete_contacts'				=> true,
		'edit_contact'					=> true,
		'read_contact'					=> true,
		'delete_contact'				=> true,
		'read'							=> true,
	);

	// Create our CRM role and assign the custom capabilities to it
	add_role( 'crm', __( 'CRM', 'tuts-crm'), $customCaps );

	// Add custom capabilities to Admin and Editor Roles
	$roles = array( 'administrator', 'editor' );
	foreach ( $roles as $roleName ) {
		// Get role
		$role = get_role( $roleName );

		// Check role exists
		if ( is_null( $role) ) {
			continue;
		}

		// Iterate through our custom capabilities, adding them
		// to this role if they are enabled
		foreach ( $customCaps as $capability => $enabled ) {
			if ( $enabled ) {
				// Add capability
				$role->add_cap( $capability );
			}
		}
	}

	// Add some of our custom capabilities to the Author Role
	$role = get_role( 'author' );
	$role->add_cap( 'edit_contact' );
	$role->add_cap( 'edit_contacts' );
	$role->add_cap( 'publish_contacts' );
	$role->add_cap( 'read_contact' );
	$role->add_cap( 'delete_contact' );
	unset( $role );

}
以管理员、编辑或作者身份登录现在将在 WordPress 管理菜单中显示“联系人”选项:
清洁提升我们的角色
如果 WordPress 管理员停用我们的插件,CRM 角色将保留在 WordPress 中。但是,鉴于没有其他插件或 WordPress 的一部分使用此角色,因此它是多余的 - 因此我们需要确保在停用我们的插件时删除 CRM 角色。
为此,请在 plugin_activation() 函数下方添加以下函数:
/**
* Deactivation hook to unregister our existing Contacts Role
*/
function plugin_deactivation() {

	remove_role( 'crm' );

}
与我们在插件激活时使用 register_activation_hook() 函数的方式相同,当我们的插件停用时,我们可以使用 register_deactivation_hook() 函数。让我们在 register_activation_hook 调用下面添加以下内容:
register_deactivation_hook( __FILE__, array( &$wpTutsCRM, 'plugin_deactivation' ) );
停用我们的插件后,我们的 CRM 角色将不再可用。
摘要
我们已经在 WordPress 中成功创建了一个简单的 CRM 系统,探索使用自定义帖子类型、帖子元字段和第三方插件集成来存储有关我们的客户和潜在客户的信息。
本教程还涵盖了 WordPress 的一些更高级的方面,包括通过 WP_List_Table 列显示高级自定义字段数据、过滤我们的帖子查询以搜索我们的高级自定义字段数据,以及通过角色和功能管理用户访问以限制访问仅限我们的 CRM 系统。


