Plotly支持在X轴和Y轴上设置范围。让我们了解如何在Plotly中设置Y轴的范围。
plotly.graph_objects is used to generate figures. It contains a lot of methods to customize charts and render a chart in HTML format.
Create a numpy module and generate random ranges for both X and Y axis.
创建Figure()方法,以线条模式绘制X轴和Y轴
Create update_layout() method and set the Y-axis range.
按照给定的步骤来设置Plotly中Y轴的范围。
第一步 - 导入plotly
导入 plotly.graph_objs 模块,并将其别名为 go
import plotly.graphs_objs as go
Step 2 − Import numpy
导入 numpy 模块并将其别名设置为 np,并设置随机 种子 值。
import numpy as np
np.random.seed(3)
Step 3 − Generate random number on X-axis
Let us generate a list of random range of numbers on X-axis.
x = list(range(0,20,2))
第四步 - 在Y轴上生成随机数
在Y轴上生成随机数如下 -
y = np.random.randn(10)
Step 5 − Generate the scatter plot
Let us generate the scatter plot with the following coordinates −
fig = go.Figure(data=go.Scatter(x=x, y=y, mode='lines'))
Step 6 − Set the Y-axis range
使用update_layout()方法设置Y轴范围。
fig.update_layout(yaxis_range=[-3,3])
步骤 7 - 显示图像
使用 show() 方法显示图表。
fig.show()
Example
的中文翻译为:示例
在Python Plotly中设置Y轴范围的完整代码如下:
# Importing Libraries
import plotly.graph_objs as go
import numpy as np

np.random.seed(3)

# generating numbers ranging from 0 to 18 on X-axis
x = list(range(0,20,2))

# generating random numbers on y-axis
y = np.random.randn(10)

# plotting scatter plot on x and y data with
# 'lines' as mode
fig = go.Figure(data=go.Scatter(x=x, y=y, mode='lines'))

# setting the y-axis range from -3 to 3
fig.update_layout(yaxis_range=[-3,3])

# to display the figure in the output screen
fig.show()
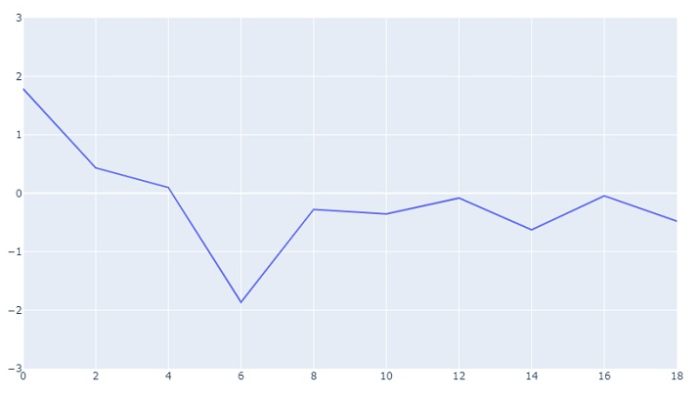
Output
它将在浏览器上显示以下输出 −